Today I will demonstrate how to make a piano book. Before starting, I should point out that I do not have the funds nor the resources to use the same machinery that the big name publishers use. However, over the past year, I have researched, questioned my musical friends, etc., and have learned the poor-man’s way to achieve professional-looking results. It takes a little more work, but this is something that could fit in most aspiring self-publisher’s budget. My startup costs were in the four digits, which is very low for starting a business. This is all possible because of amazing new technology that has arisen in the past couple of decades.
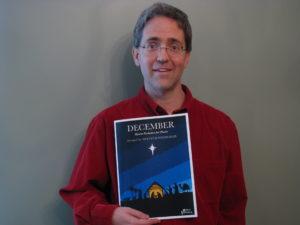
Now I will take you on a tour, showing you how I put together a copy of December.
Step #1: Prepare the electronic copy
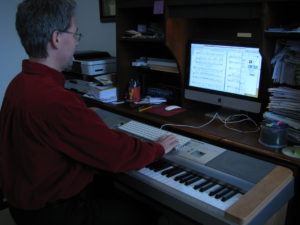 Before you can print, you have to create the entire layout. There are several affordable products (that is, less than $1000) that can help your music look good. I use Finale, as that’s what I was taught in school, and what I’ve used for years.
If you’re new to music engraving software, you may experience a steep learning curve, but there are plenty of free resources on the internet to help you out. Even after years, I’m still learning new techniques.
 I use software called ForScore on the iPad to make manual edits and help me lock down the final electronic product. ForScore is only a few dollars, and it’s great with organizing your music and taking notes with the iPencil. It also supports page turns from a Bluetooth device. (Awesome!)
After making final edits in Finale, I create a set of pdf files. One file for the inside pages, and the other for the outside cover.
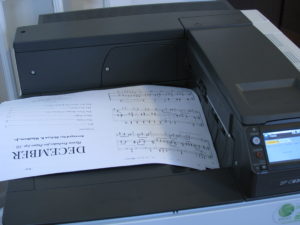
Step #2: Print the pages
 In principle, putting together a piano book is very simple. On several large sheets of paper, you print two pages on the front, two pages on the back, and then staple and fold to get a booklet. Would you like to give it try?
Take any pdf file that’s more than four pages long. Open it using the latest free Adobe Acrobat Reader software. My version calls itself “DC.”
Open the Print menu, and under “Page Size and Handling,” choose the “Booklet” option. This will shrink the document to fit two on one page. If you choose to print on “Both Sides” then Adobe will arrange the pages so that they print in booklet format.
Go ahead and hit Print and see what comes out. I’d estimate around a 40% chance (I am also an actuary) that your document will print correctly the first time. If you’re able to find the front page, staple and fold, and end up with a booklet with pages in the right order, then you’ll know the settings are correct. Depending on your printer, you may have to choose “Reverse Pages” or “Landscape” or some other annoying setting. After a little trial and error, you should be able to find settings that work for you.
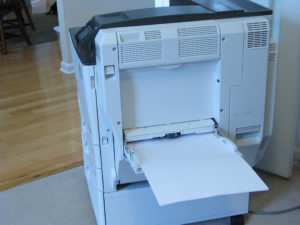
If you made it this far with your Adobe experiment, then I think you have the gist of what I do. Except when you want to print something that looks professional, you must go a little farther. I’ve tried using an inkjet printer to produce professional-looking piano booklets, but that effort failed miserably. Either the ink wasn’t dark enough or it smeared all over the place. A laser printer is a minimum requirement for producing an acceptable product.
 Piano music gives another complication. Have you ever noticed how hard it is to copy music? It’s too big to fit on the copier, and stuff on the edges get chopped off. That’s because piano books are universally 9×12, slightly larger than Letter size.
There are plenty of cheaper printers built for handling Letter paper, and even 11×17, which is Letter size doubled (for booklets). But for piano, you need to print on 12×18 paper (9×12 doubled), or you won’t be taken seriously. Unfortunately, those extra couple of inches seems to push the price of printers from low range to the mid range.
I had to settle with a RICOH/Savin C830DN. It can’t handle 12×18 in the tray, but I can feed it through the bypass on the side.
 For the inside sheets of my piano book, I use 70# text paper. It’s thicker than your standard office paper, and is really nice for piano books. I use the Adobe Booklet method described above to print four 9×12 pages on one sheet of 12×18 paper.
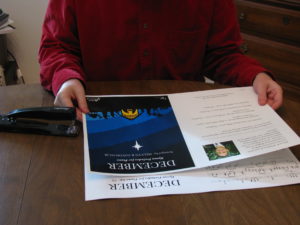
The cover is printed on 80# semi-gloss cover paper. It provides a stiffer feel for the book and looks good. Since the opposite side is blank, I don’t print in Booklet format, but rather I prepare a full 12×18 page that has the front cover to the right, and back cover to the left.
Step #3: Assemble the book
Most professional printing shops have fancy machines that not only print, but will also do the folding/stapling/trimming parts. You just push the button to create the product (after having set it up), and a finished book comes out the other side.
But as I said before, those of us starting out must do things the poor-man way. Don’t be afraid to do this starting out. One professional printing company showed me the poor-man equipment they themselves used when they were starting out.
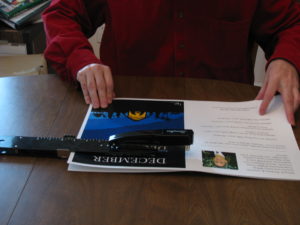
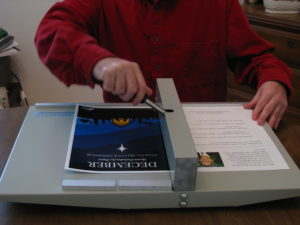 In this first picture, I am using a scoring board to prepare the cover. The funny thing about 80# cover paper is that it’s fragile. If you simply bend it, it will crack and look unprofessional. However, if you pre-crease it, then it becomes much easier to fold, and it doesn’t crack.
If you want to go really cheap, you could use one of those Martha Stewart hand-held mini score boards, but I decided to pay a few more dollars to get something much more heavy duty and dependable. I’m using the OrangeA Scorer, which I believe has just the right balance of quality and price for my purposes.
Next comes the positioning stage. I take the cover page and place it on top of the inside sheets, matching the outside title with the inside title. Then I staple the pages together using a long-reach stapler. This Swingline model is decent and cheap, but the measurement guide seems too easy to move. So, I must always double-check the guide, else the staples land in the wrong spot, and I must start over with a new print.
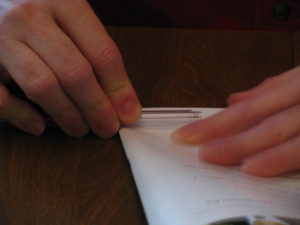 After the stapling comes the pressing of the edge. The cover and all the pages on the inside need help flattening out. Here, my tool is a hollowed out pen tube with no markings on it (markings will smear on to the paper). It also needs to be round. As I hold the opposite edges to line up, I run the pen tube along the whole length of the spine, pushing it all as flat as I can get it.
Then there is one final task. If you have enough pages in the inside, the ones near the center bulge out due to creep. That is, the opposite edge ends up with an annoying triangle pattern. The unevenness makes the book look amateurish and makes it harder to turn pages.
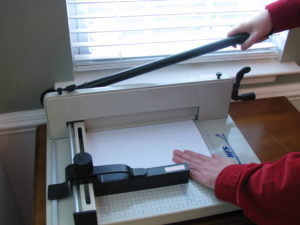 To fix this, I use my last machine, a guillotine cutter. Put the book into place, clamp it down, and chop off those edges. I’ve found that I can only do one book at a time. If I do more than one, the thicker binding at the staple makes things slant, and the result is uneven cuts on some of the books.
I landed on this particular product, which works pretty well, except the guide rulers are slightly diagonal. From one end to the other, the rulers get off a full millimeter. It’s easy for me to adjust, but it can be annoying.
One day when I become successful enough, I will buy one of those fancy machines that does all the above with one push of a button. You can even tell these machines to pull the cover from a separate drawer, score it, collate with the inside pages, staple, fold, and finally trim.
Yeah — if some benevolent millionaire happens to be reading this, I have an idea for a Christmas present.
Final Step: Sell the book
 Once the product is created, the last step is to sell it, and that’s a different story. When I took a few copies somewhere to showcase, I was able to sell them all with almost no effort. Online sales, on the other hand, are currently slow.
Now you know what I do to put together one of these books. If you’re willing to bring all of this together, and you’re willing to do all the work, then you, too, can launch your very own publishing company and produce professional looking products.
Leave a Reply